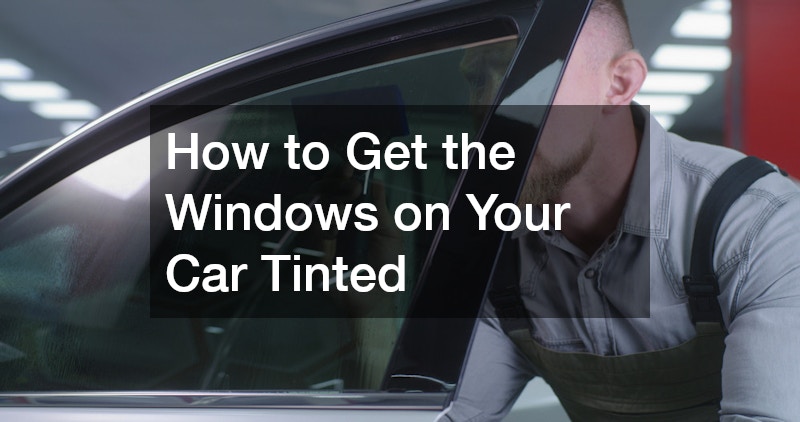
For many vehicle owners, upgrading their car’s glass is one of the most rewarding investments they can make. Adding a premium protective film to your vehicle does far more than just give it a sleek, stealthy aesthetic. High-quality window films block harmful ultraviolet (UV) rays, protect your car’s interior from fading, drastically reduce cabin temperatures during scorching summer months, and provide a vital layer of daily privacy and security.
However, getting your windows modified isn’t as simple as buying a cheap roll of film online and slapping it on in your garage. Achieving a flawless, bubble-free finish that complies with regional safety laws requires a clear understanding of material options, installation techniques, and state regulations. Navigating the process for the first time can feel overwhelming with so many options available. This comprehensive guide provides an in-depth, step-by-step blueprint to help you prepare your vehicle, select the right materials, choose the best application specialists, and maintain your investment for years to come.
1. Navigating Regional Legal Boundaries and Visible Light Transmission (VLT) Standards

Researching Local Window Film Statutes and Understanding Dark Percentage Metrics
Before spending a single dollar on upgrading your vehicle’s glass, your very first step must be looking into local traffic and safety laws. Film darkness is measured by Visible Light Transmission (VLT), which represents the exact percentage of light that can pass through the treated glass. Every state and region enforces its own strict, non-negotiable legal limits for VLT percentages, often separating regulations for the front side windows, rear side windows, and the back windshield.
If you install a film that is darker than your region’s legal VLT limit, you risk receiving costly traffic citations and being forced to peel off the expensive film. Furthermore, excessively dark windows can cause your vehicle to fail a mandatory state car inspection, meaning you will have to pay for removal and re-application just to keep your registration active. A reputable professional will always check your local laws, ensuring your upgrade looks great while remaining completely legal.
-
Audit Front vs. Rear VLT Variances: Check your local department of motor vehicles portal to see if your state allows darker films on rear passenger glass than on the driver and front passenger windows.
-
Understand the AS-1 Windshield Line Standard: Look closely at your front windshield for the small, factory-stamped “AS-1” line; legal eyebrow strips generally cannot extend below this marker.
-
Factor in Pre-Existing Factory Glass Variables: Remember that most factory windows already feature a subtle 70% to 80% VLT tint from the manufacturer, which will make your aftermarket film look slightly darker once applied.
2. Evaluating Modern Window Film Material Technologies
Comparing Dyed, Metallic, and Ceramic Materials for Optimal Thermal Performance
Not all window upgrades are created equal. The material technology you choose directly dictates how well your car blocks heat, how long the film lasts before fading, and whether your electronic signals remain clear. The lowest-cost option is dyed film, which relies on a layer of dark dye to absorb solar heat. While dyed options look great initially, they offer minimal thermal protection and are prone to turning a distorted purple color over the years of sun exposure.
For premium performance, moving up to advanced ceramic car tints is highly recommended. Ceramic films utilize non-conductive, nano-ceramic particles to block up to 99% of ambient UV rays and massive percentages of infrared heat without changing your visibility. Unlike older metallic films, ceramic variants will never interfere with your smartphone’s GPS tracking, Bluetooth connections, or satellite radio signals, making them the gold standard for modern, tech-heavy vehicles.
-
Avoid Low-Tier Dyed Films for Long-Term Projects: Pass on standard dyed materials if you park your vehicle outside frequently, as UV exposure rapidly breaks down cheaper chemical dyes.
-
Analyze Total Solar Energy Rejection (TSER) Ratings: Look past simple darkness percentages and analyze the film’s TSER rating, which measures its true ability to block infrared heat.
-
Confirm Signal Clarity with Non-Metallic Material Choices: Choose ceramic or carbon-based upgrades if your vehicle relies heavily on internal glass-mounted radio antennas or advanced navigation networks.
3. Choosing a Certified Professional Installation Facility

Vetting Automotive Customization Centers and Analyzing Cleanroom Infrastructure
While DIY installation kits are widely available online, attempting to apply window film yourself often ends in frustration, trapped dust particles, and ugly bubbling. Achieving a factory-quality finish requires an incredibly clean, temperature-controlled indoor bay. Any airborne dust, lint, or pet hair present during installation will get permanently trapped beneath the film, ruining the look and clarity of your glass.
When searching for premium car window tinting services, look closely at the shop’s setup and cleanliness. Elite custom shops handle film applications inside fully enclosed, pristine bays equipped with specialized air filtration networks to keep dust at bay. Vetting the facility’s workspace guarantees that your vehicle receives a seamless, edge-to-edge application that matches the quality of elite color wraps and custom paint finishes.
-
Demand a Fully Enclosed Indoor Workspace: Never hire a mobile service that offers to tint your car outside on a driveway, as wind and dust will inevitably ruin the adhesive layer.
-
Analyze the Shop’s Past Project Portfolios: Review high-resolution close-ups of their previous work, paying close attention to how cleanly the film aligns with the curved defroster lines on rear windshields.
-
Inquire About Advanced Digital Plotter Cutting Systems: Prioritize shops that use computer-guided digital plotters to cut film precisely to your vehicle’s exact glass blueprints, avoiding the risk of hand-cutting blades scratching your window seals.
4. Coordinating Complete Vehicle Surface Upgrades and Structural Care
Harmonizing Glass Enhancements with General Cosmetic and Frame Restorations
Upgrading your windows is a fantastic way to elevate your car’s look, but a sleek new tint can quickly draw unwanted attention to pre-existing dings, faded paint, or dented body panels. For the absolute best results, time your glass upgrades to work alongside your vehicle’s overall cosmetic maintenance plan. Addressing structural flaws first ensures your car looks polished and cohesive from bumper to bumper.
If your vehicle has recently been involved in a minor fender bender, it is wise to visit trusted auto body shops to smooth out exterior panels before scheduling your cosmetic upgrades. Coordinating your window enhancements with professional auto body repairs ensures your car’s paint, panels, and glass look balanced, flawless, and completely restored all at once.
-
Execute Major Paint Correction Packages First: Schedule any intensive exterior detailing, scratch removals, or ceramic coatings before your window film application to keep detailing sprays away from curing adhesive.
-
Inspect Weatherstripping and Window Track Seals: Ensure your door gaskets are fully intact and clear of debris; worn or cracked weatherstripping can scrape and scratch your new film when rolling the windows down.
-
Address Prior Frame and Panel Alignment Vulnerabilities: Resolve any shifting door alignments first, ensuring your glass tracks smoothly without placing uneven mechanical pressure on the new film edge.
5. Inspecting Structural Glass Foundations for Structural Weaknesses
Repairing Surface Chips and Micro-Fractures Before Applying Protective Film
You should never apply aftermarket window film over glass that is already chipped, cracked, or structurally compromised. The specialized adhesives used in window films contract slightly as they cure, which can put stress on existing damage and cause minor rock chips to spread into massive spiderweb cracks. Furthermore, trapping a glass blemish beneath an expensive sheet of ceramic film means you will have to tear out and replace the film down the road when the glass inevitably needs fixing.
Before booking your appointment, take your vehicle to a certified auto glass service center for a meticulous inspection. Addressing surface pitting and filling minor rock chips with clear structural resin ensures a perfectly smooth foundation for your upgrade. Taking care of these underlying issues first protects your investment and ensures your new film adheres flawlessly.
-
Execute a Thorough Visual Inspection for Micro-Fissures: Run your fingernail gently along both sides of your windows to catch hidden surface pits or small cracks before the film goes on.
-
Utilize Professional Polyresin Injection Methods: Fix any small bullseye cracks using specialized clear resins to completely level the surface of the glass pane.
-
Ensure the Glass Base Is Fully Stationary: Confirm that your windows roll up and down smoothly without rattling, as loose glass can cause film edges to peel over time.
6. Navigating Comprehensive Maintenance and Automotive Service Schedules
Coordinating Upgrades with Everyday Upkeep and Diagnostic Timelines
Treating your car to a premium window upgrade should fit naturally into your broader vehicle maintenance routine. When your car is at the shop for window film application, it is the perfect time to knock out other routine maintenance tasks on your list. Balancing cosmetic styling with mechanical care keeps your vehicle running reliably while looking its best.
While your car is in a dust-free bay for its window upgrade, consider organizing your schedule to handle routine mechanical tune-ups or auto repairs at a nearby service center. Taking care of your oil changes, brake pads, and local auto repairs alongside your cosmetic enhancements saves you extra trips to the shop and ensures your car is both mechanically sound and visually striking.
-
Build a Unified Vehicle Service Window: Group your detailing appointments and routine mechanical oil services into a single week to minimize your time without a car.
-
Inform Mechanical Crews of New Film Additions: Remind your mechanics not to attach diagnostic suction cups, plastic work orders, or tracking stickers to the inside of your treated windows during service.
-
Coordinate Fluid and Filter Replacement Milestones: Swap out old cabin air filters right after your window service to prevent aging HVAC systems from blowing dusty air onto the curing film layers.
7. Mastering Post-Installation Curing Protocols and Care Techniques
Tracking Moisture Evaporation Variables and Sourcing Safe Chemical Cleansers
Once your new film is applied, the critical curing phase begins. The liquid solution used to position the film takes time to fully evaporate through the porous material structure. During this drying period, it is entirely normal to see tiny water pockets or a slightly hazy appearance. You must leave your windows completely rolled up for at least three to five days after application; rolling them down too early can catch the edges and peel the film right off the track.
When the curing process is complete, you must completely rethink how you clean your windows. Never use aggressive, ammonia-based glass cleaners, as ammonia chemically attacks the top coats of aftermarket films, causing them to turn brittle, crack, and lose their clarity. Instead, stick to soft microfiber cloths and specialized, ammonia-free foaming cleansers to keep your windows looking brand new.
-
Enforce the Immediate No-Roll-Down Rule: Place temporary tape over your window switches as a visual reminder to keep the glass rolled up tightly during the initial curing phase.
-
Allow Extra Drying Time for Colder Climates: Give the film a few extra days to cure if you are installing it during winter or in highly humid conditions, as cold air slows down water evaporation.
-
Exclusively Utilize Soft Microfiber Towels: Toss out old, abrasive paper towels and rough cotton rags, using only clean microfiber cloths to clean your glass without creating micro-scratches.
8. Evaluating Specialized Maintenance and Glass Restorations
Utilizing Specialized Tech Bays and Reviewing Industry Field Standards
Over the lifespan of your vehicle, you may run into unexpected issues like a rogue rock cracking a window or a tough scratch marking your window film. When your vehicle’s perimeter shields need attention, knowing where to turn for advanced help is essential. Complex glass challenges require specialized tools that go far beyond standard garage gear.
For advanced structural damage, extensive pitting, or complex window tracking adjustments, seeking out specialized auto glass repair garages ensures your vehicle is treated with industrial-grade precision. These dedicated bays feature specialized tools to replace broken side windows, properly recalibrate safety cameras, and safely remove old adhesive without damaging your internal defroster grids. Trusting your car to dedicated specialists guarantees that your vehicle’s visibility and safety are fully restored to factory standards.
-
Verify Specialized Adhesive Extraction Tools: Ensure your choice workshop utilizes professional steam extraction machinery to dissolve old tint glues without scratching internal glass surfaces.
-
Demand Strict Regulatory Glass Safety Compliance: Partner with certified restoration garages that use high-performance replacement glass that meets original safety standards.
-
Confirm Precision Window Calibration Standards: Work with tech hubs that fully recalibrate advanced driver assistance system (ADAS) cameras mounted near your windshield glass to ensure your safety features work perfectly.
Upgrading your vehicle with a premium window tint is a highly effective way to enhance driving comfort, protect your cabin interior, and elevate your car’s everyday styling. By stepping away from cheap DIY alternatives and approaching the process with a clear, systematic plan, such as checking your local VLT laws, selecting high-performance ceramic materials, choosing cleanroom-certified professional shops, and following strict post-care curing steps, you ensure a flawless, bubble-free finish that lasts for years. A premium window upgrade does far more than just look great; it forms a durable shield around your interior assets, keeping you cool and comfortable on every journey.
Ultimately, getting the best results from your investment relies on doing your homework upfront and trusting your car to specialists who treat your vehicle with absolute professional care. Combining your window enhancements with routine vehicle maintenance and professional glass care ensures your car stays safe, visually striking, and running beautifully. Stay mindful of regional legal limits, choose high-quality materials, and maintain your new film with gentle, ammonia-free care. By taking this disciplined, proactive approach to your car’s glass, you will enjoy a cooler, safer, and more stylish ride for many miles to come.